Proven Change Management Models: A Detailed Comparison Guide

Adding video into a presentation can help further explain your point while also giving you a break from talking. This also gives you a way to break up your presentation so you don’t lose your audience’s attention.
But if you don’t know how to insert a video into PowerPoint, you might be at a loss on how to incorporate it into your presentations.
Throughout this article, we’ll walk you through inputting video content into PowerPoint slides and Visme slides and how to make the most of incorporating video into your presentation.
*Disclaimer: PowerPoint is a registered trademark of Microsoft Corporation. Visme is not affiliated with or endorsed by Microsoft. References to PowerPoint are for descriptive purposes only.
If you want to insert a video file from your computer into PowerPoint, keep in mind that you can only do this with the downloaded version. The in-browser version of Microsoft PowerPoint doesn’t support video files—only images.
Follow these steps to insert a video file from your computer:
With PowerPoint, when you save your presentation file, having an embedded video will greatly increase the file size. If you want to avoid that, you can also link to a video file on your computer.
To do that, you’ll follow the above steps, but instead of clicking Insert, you’ll click the arrow next to it, then select Link to File from the dropdown menu. You’ll then be able to click on the link and have the video open in your computer’s native video player rather than embedding it in your presentation.
If you have earlier versions of PowerPoint (Office 2010 and 2013), visit the official Microsoft support site to learn how to embed videos. Or check out other PowerPoint alternatives that allow you to embed videos into your presentation.
Another way to insert a video into PowerPoint is to use an online video. This can be done on both downloaded and in-browser PowerPoint versions.
First, head to YouTube (or SlideShare, Vimeo, etc.) and find your video of choice. Copy the video URL and go back to PowerPoint.
Again, select the slide you want your video to appear on. Then go to the Insert tab. Here, you’ll see an Online Video option.
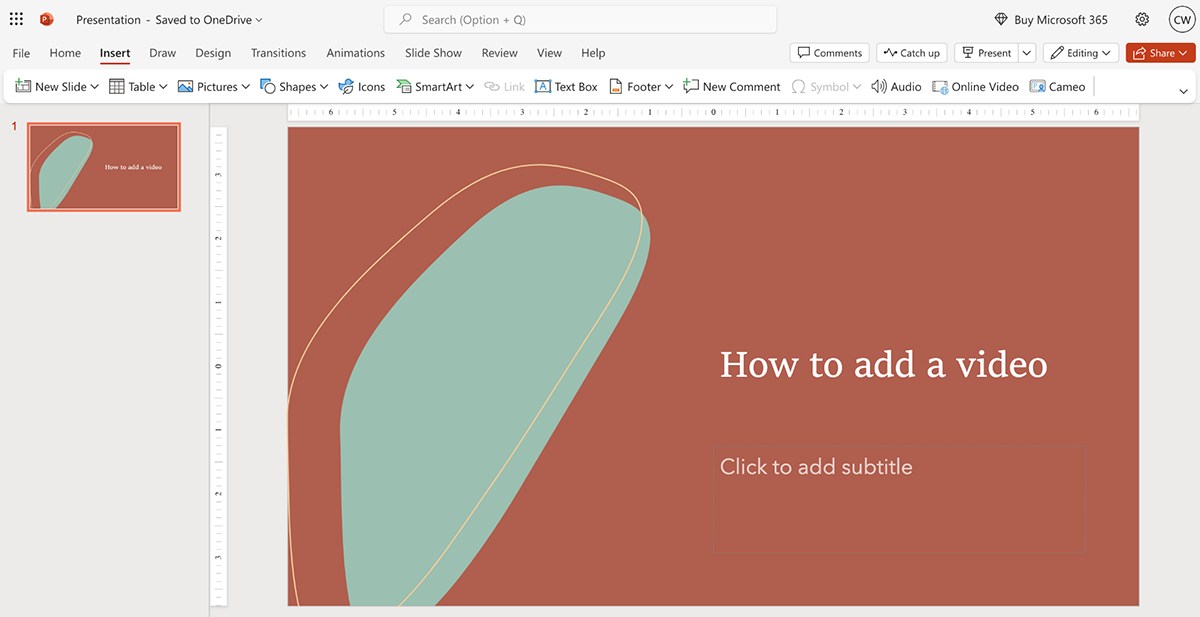
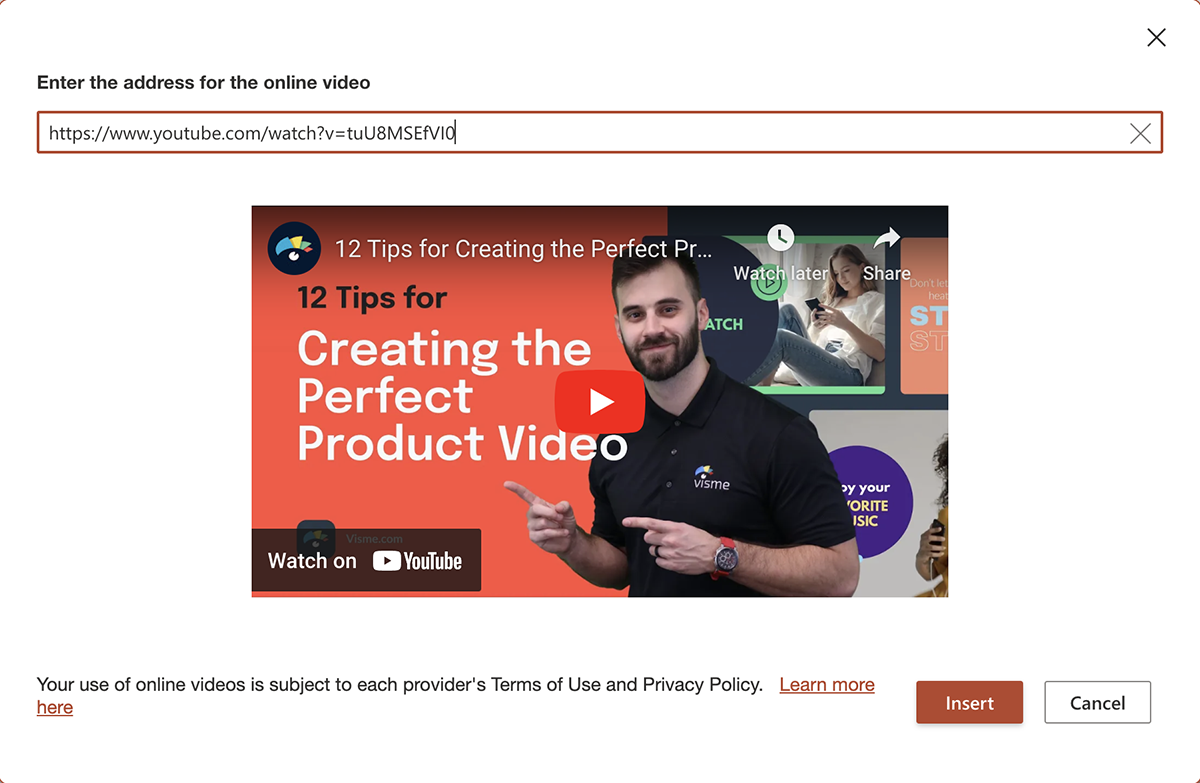
Click Online Video and a pop-up will appear for you to paste your video of choice’s link. A preview of the video will auto-populate so you can ensure you’re adding in the right one. Then click Insert.
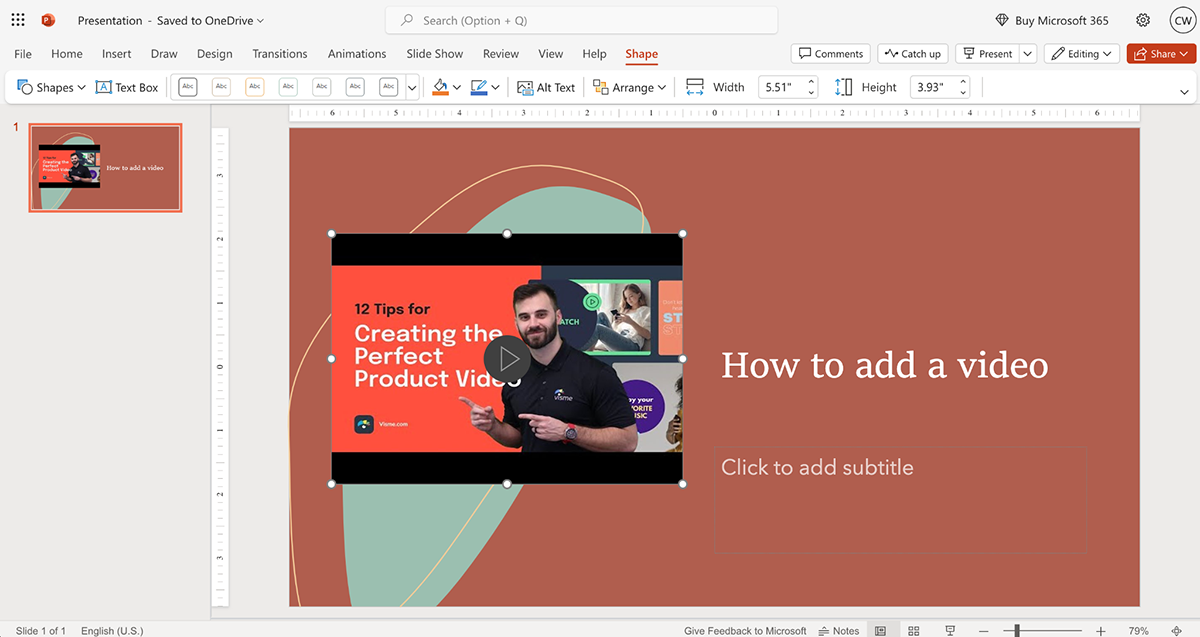
You can then resize the video and move it to the spot you want it to live on your slide.
When you go to present, you’ll be able to click on the video to play it through. You can also make it full screen for easier viewing for your audience.
There are four ways to insert a video into a Visme presentation:
Let’s walk through each one.
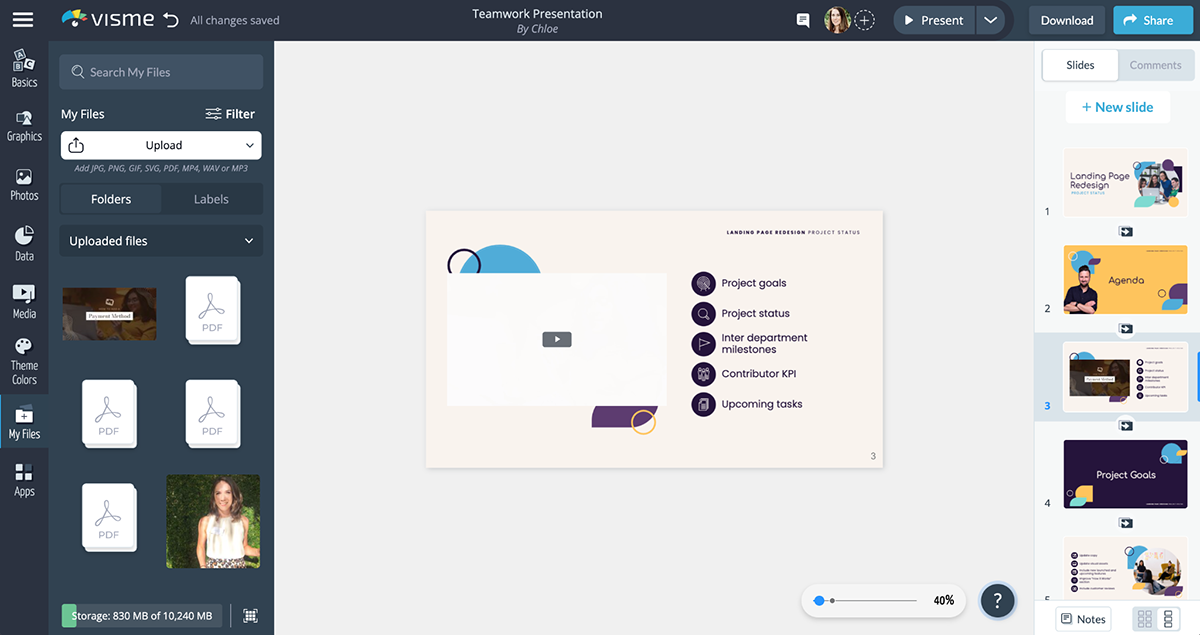
First, if you have a video file on your computer that you want to embed in a slide, add it to My Files. You can do this in the My Files tab of your Visme dashboard or editor. Simply upload your video file so that it’s accessible while you’re editing your presentation.
Then, drag it onto your slide and place it in the exact spot you want it to live.
You can also click on one of the corners of the video and drag it to resize the video window to perfectly fit the slide or the area on the slide you want to put it.
There are two different ways to embed an online video. The first way is through the Media tab in the Visme editor. Click on Embed Online Content and a pop-up window will appear for you to paste the link to your online video.
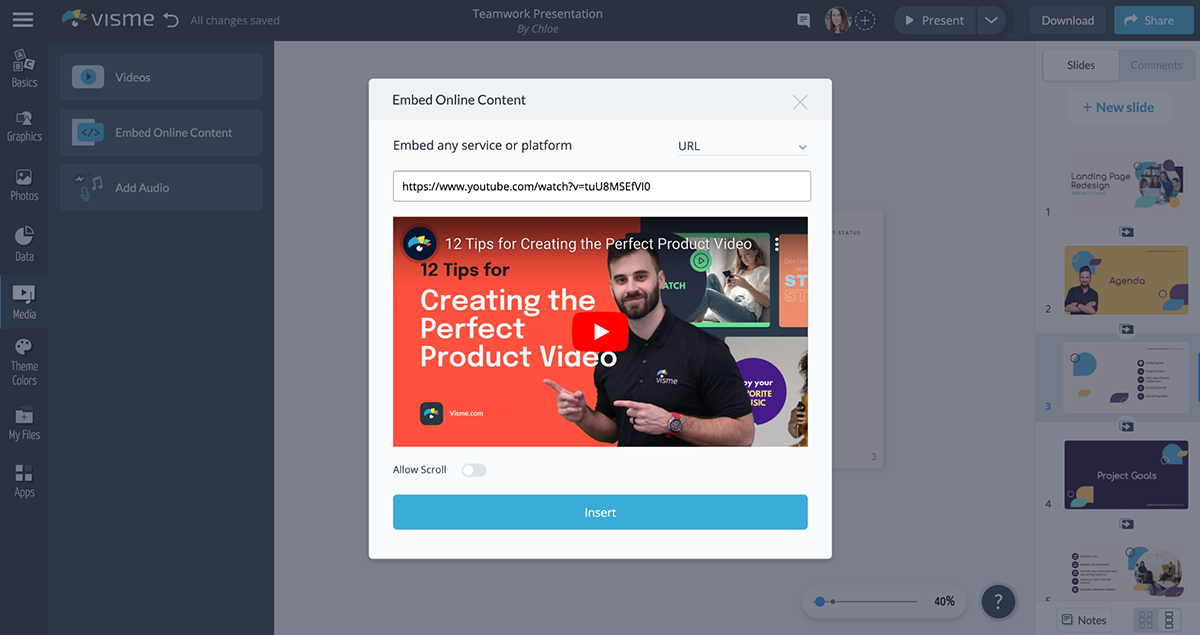
Your video will auto-populate so you can make sure you’ve copied the right link. Then click Insert and drag your video to where you want it on the slide.
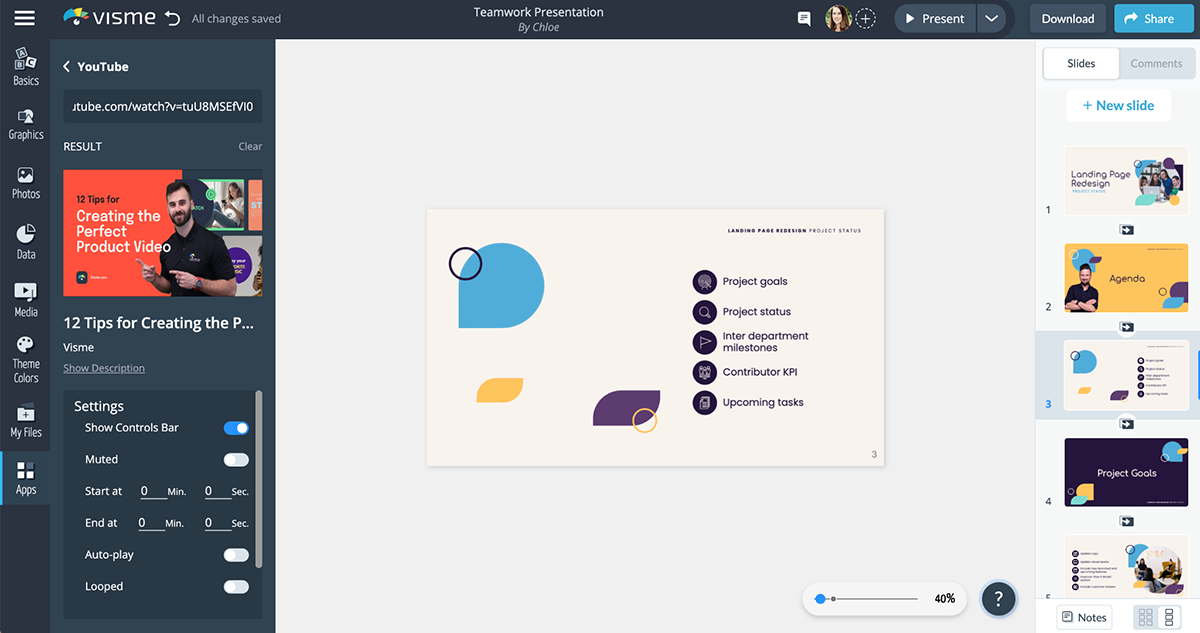
The other way to embed an online video is through the Apps tab. Visme has integrations with a number of online tools, including YouTube and Vimeo.
Select the video platform of your choice—in our case, we clicked on YouTube—and paste in your video link. There are a few other settings you can adjust before clicking Insert Video.
If you head back to the Media tab, you’ll see the first option is Videos. Click on that to access our library of stock videos. These are useful for a number of different things.
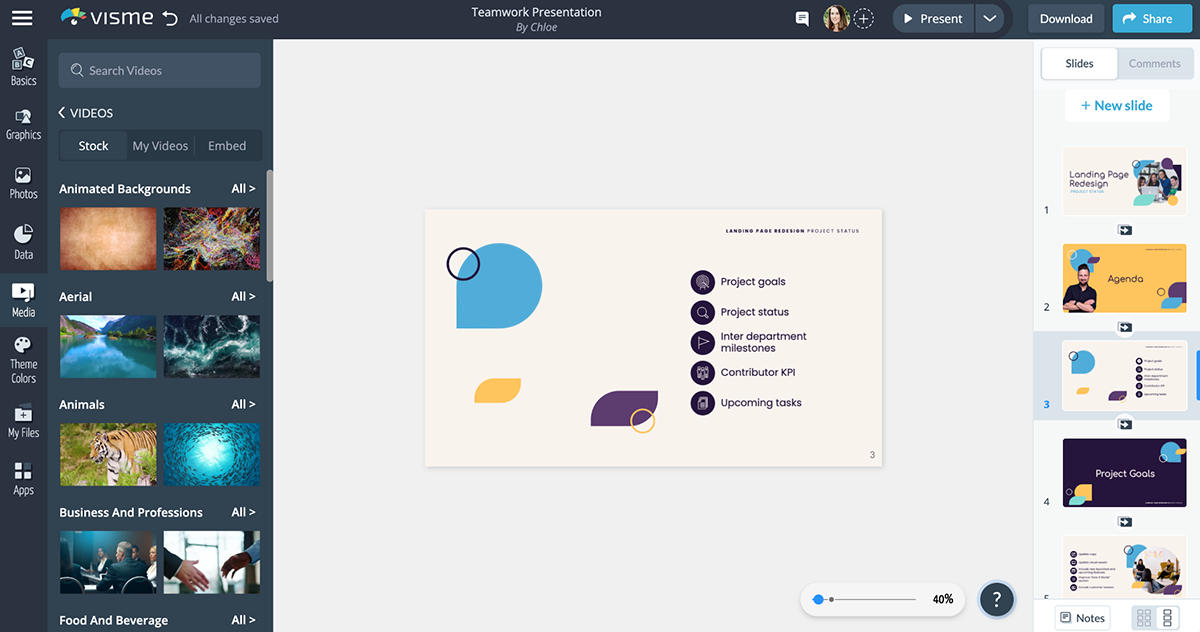
First, you can use them to add a moving background to your presentation. Second, you can add your own voiceover to a stock video. Third they’re useful for video content and video presentations.
Drag a video onto your slide or hover over it, select the gear and set it as your slide background. You can search the videos to find ones that are most relevant to your presentation topic.
You can also click over to the My Videos tab to access the video files you’ve uploaded or click Embed to access all of the video integration options.
The last option is to record a video of yourself that you can then play during your presentation or allow viewers to watch if you share your presentation asynchronously.
You can use Visme’s presentation recording software to create a voiceover throughout your entire presentation—or you can create hot spots on various slides where you record yourself digging deeper into a specific topic.
To do that, find the slide you want your video to live in. Then, select the object on the slide that your video will link to (this could be a shape, icon, text box, photo, etc.).
Then, click Actions in the top right corner of the canvas area. From the dropdown menu, click Actions again. A pop-up will appear, and you’ll need to click down to the Hotspot section, then click the Video tab.
From here, you can record a video of up to 60-seconds in length. Then, as you present, you can click on the object to play your pre-recorded video.
Now that you know how to insert a video into PowerPoint or Visme, let’s talk about why you would want to do that. If you’re already giving a live presentation, why and how would video complement it?
Video helps break up the monotony of a presentation and can offer additional insights on your topic. Plus, it can create a more engaging experience. And it can be a huge help for asynchronous presentations.
Here are five of the top ways to use video content in your presentations.
Create a presentation that’s meant to be experienced as a video. Use a template like the one below as a starting point for your video presentation.


There are a few ways to do this:
This will create a presentation that autoplays on its own, provides more audio context and entertains viewers throughout.
Is there an expert who knows your topic even better than you do? Instead of trying to quote them or explain their opinion, embed their own video and feature them within your presentation.
Find the video on an online video host, copy the link and embed onto a slide in your presentation. You can have the video take up the entire slide or place it on the slide where you introduce the expert and the video you’re about to play.
You don’t want video content to take up your entire presentation. Instead, keep it short, either playing only the most important section of the video or including a video that’s a couple of minutes or less.
Use stock videos that are relevant to your topic as backgrounds to your slides. This will grab your audience’s attention without intruding too much into your speech.
Here’s an example of what a presentation with video clips in the background might look like:


It can make your presentation much more engaging and help it stand out from your typical, every day presentation design.
Here’s how to add videos to your background in Visme editor
When embedding videos, help them feel like a native part of the slide by adding shapes and other design elements around your video. Here’s an example of what you could do with shapes:

You can use rectangular shapes that fit around the video as well, giving it a bit of a border. The choice is up to you and the type of design you’re incorporating into your presentation.
Videos are a great way to take your presentations to the next level. Whether you record yourself speaking, use an online video or create a video with Visme to embed in your presentation, the possibilities are endless.
Take advantage of Visme’s presentation software where you can access thousands of templates, millions of design elements and so much more.
Design visual brand experiences for your business whether you are a seasoned designer or a total novice.
Try Visme for free